Dried orange decorations are a terrific way to transition from fall to Christmas decor. I love Christmas decorations that are natural or home made, and these ones have the added bonus of smelling terrific.
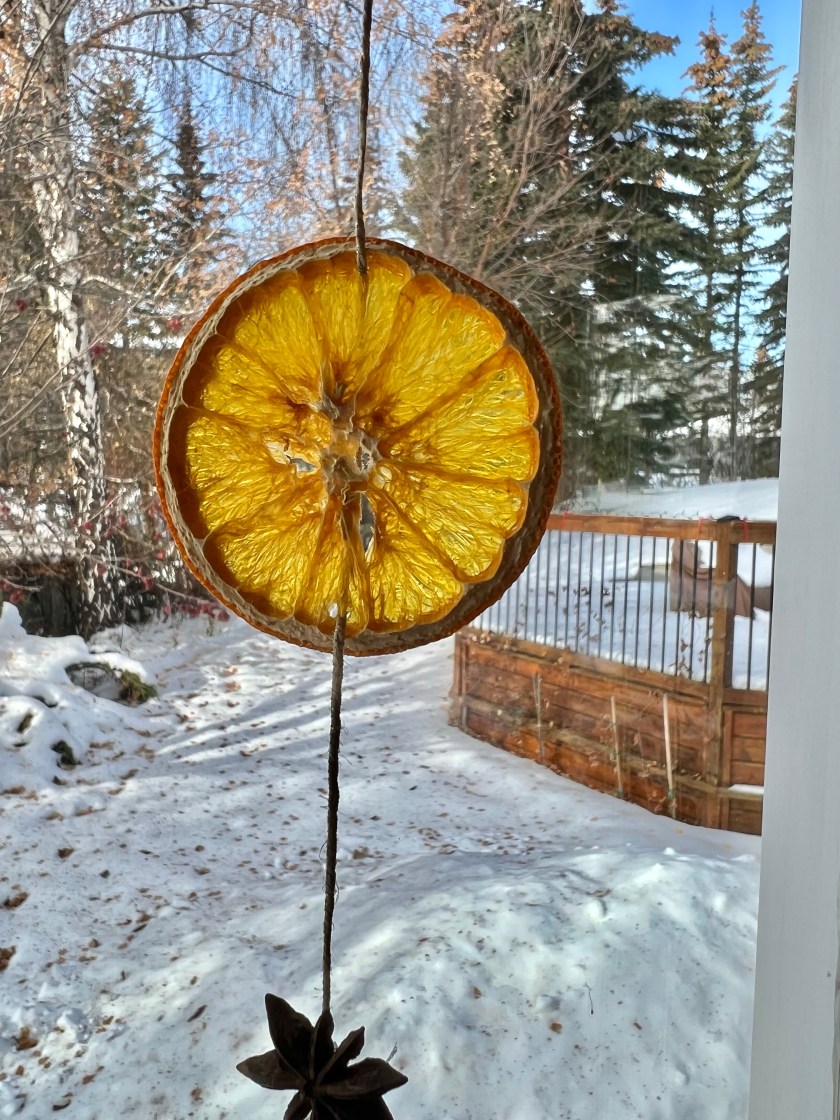
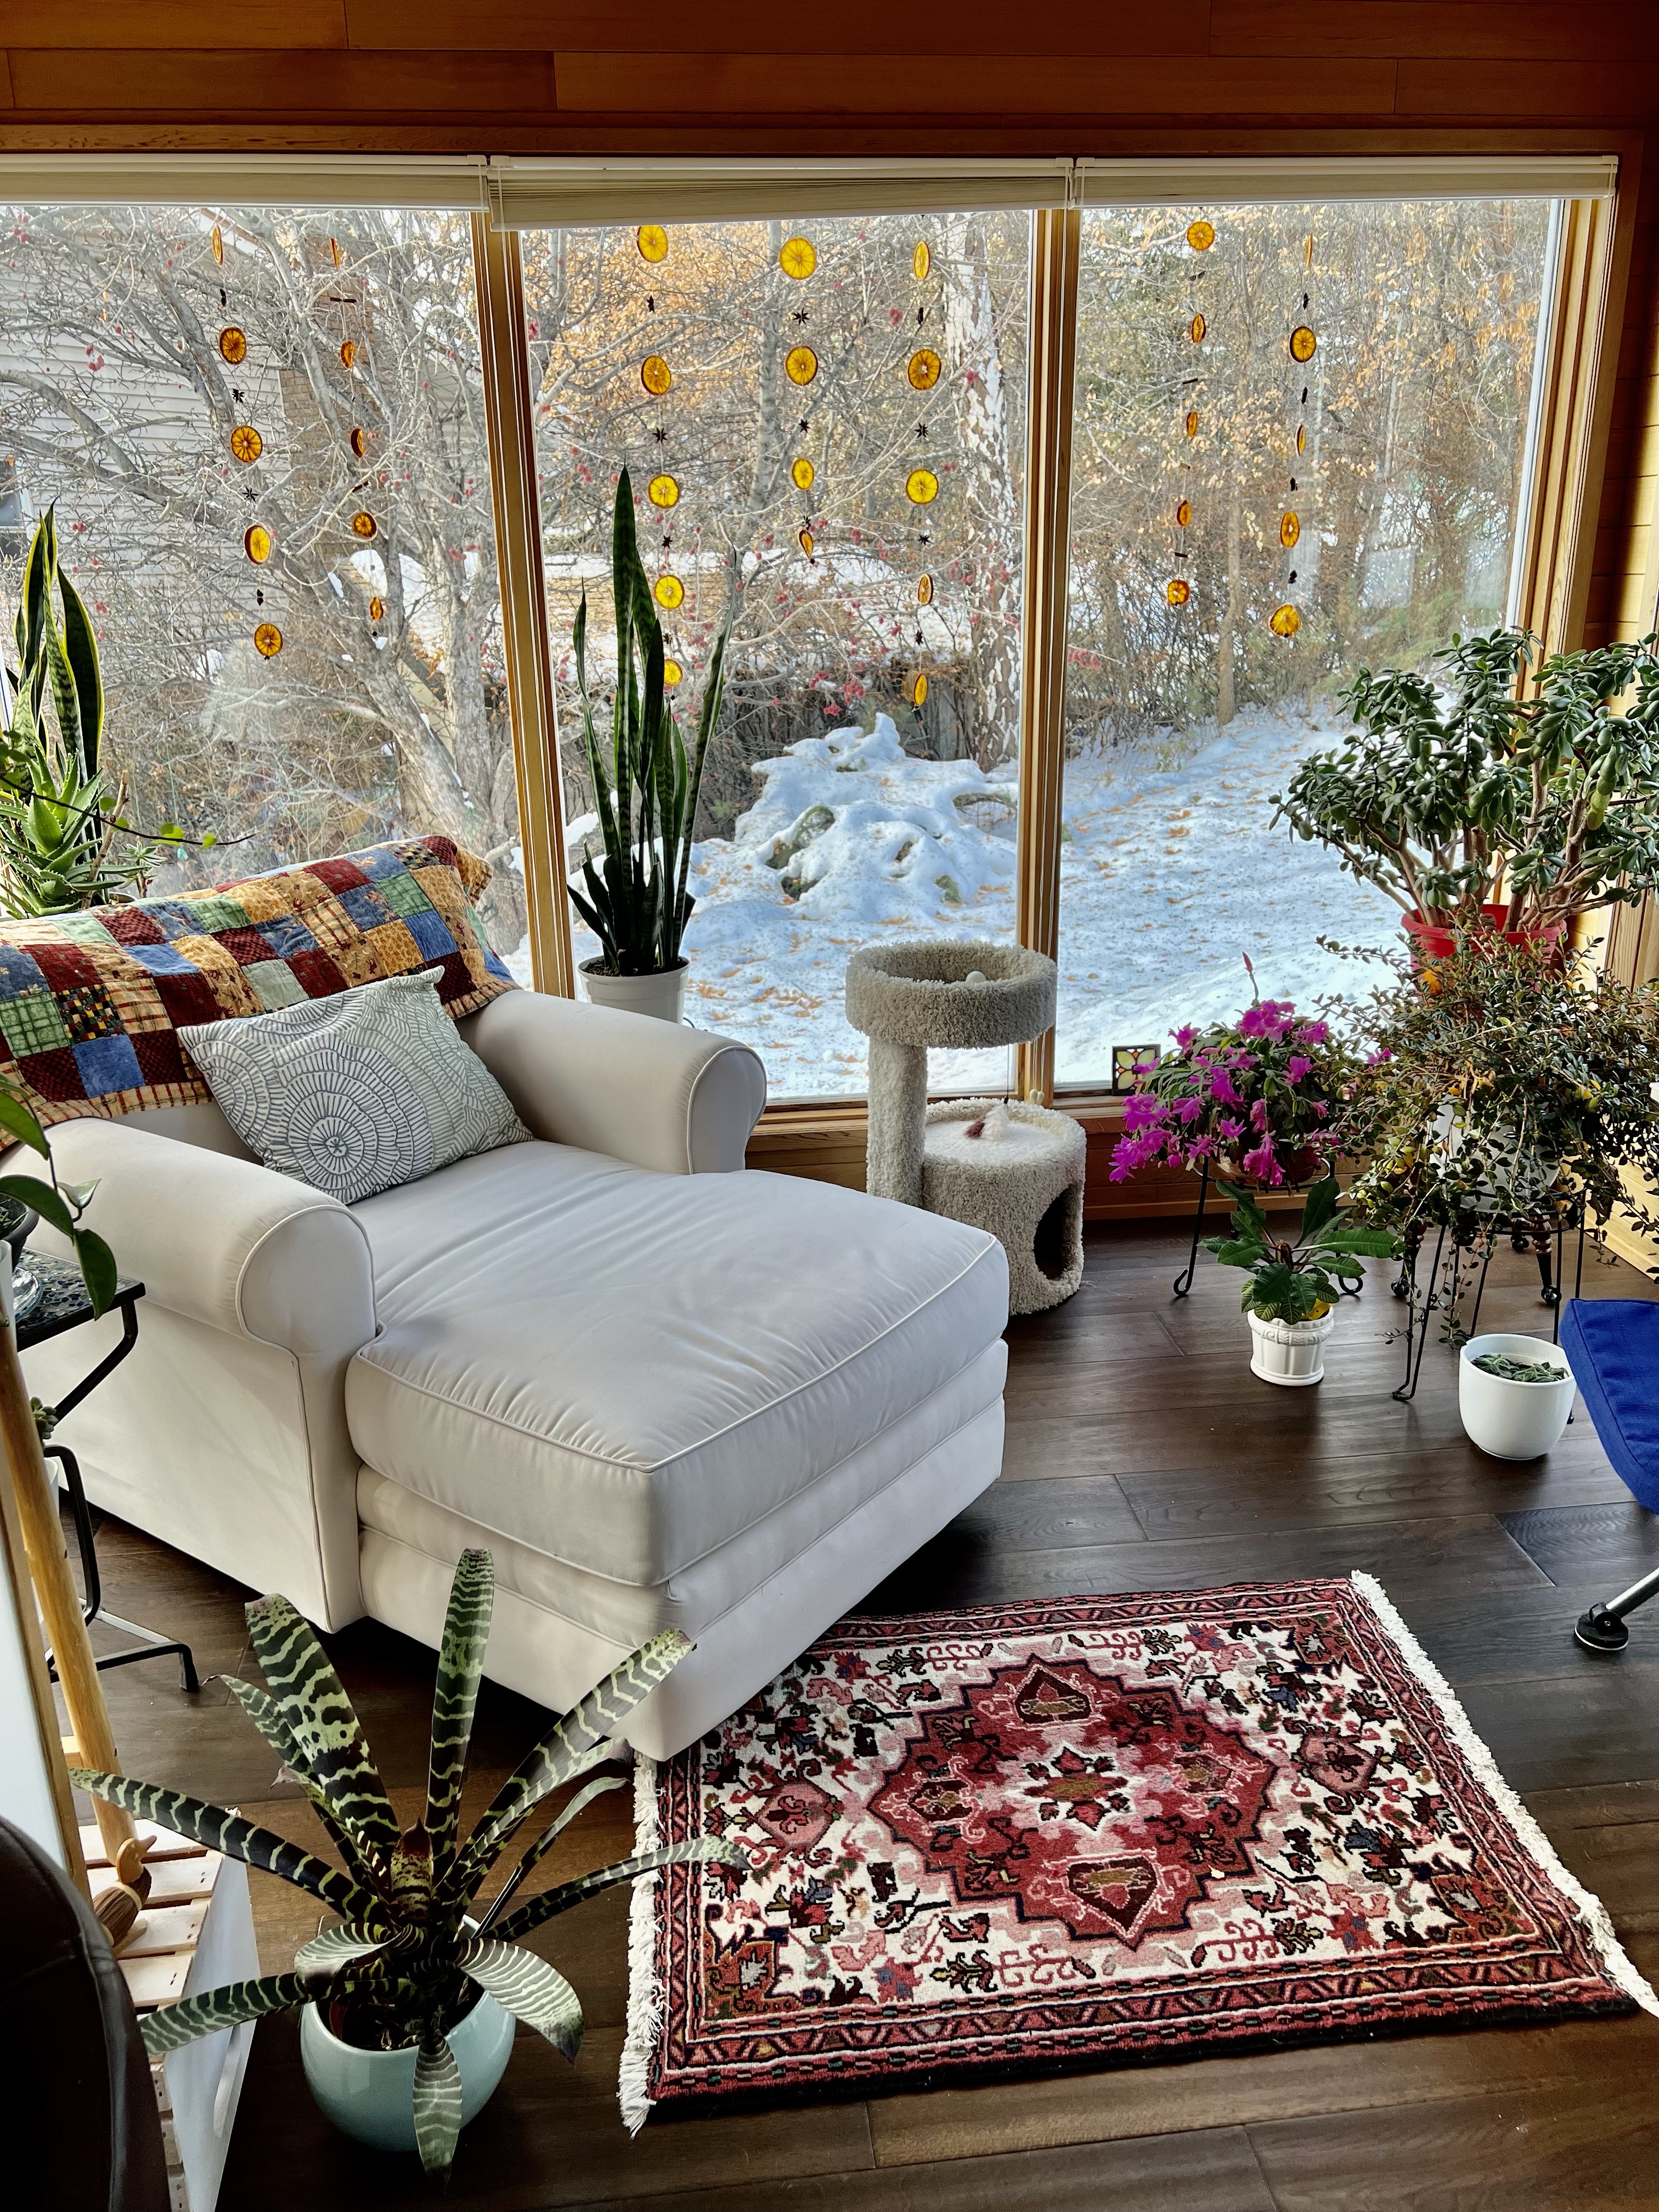
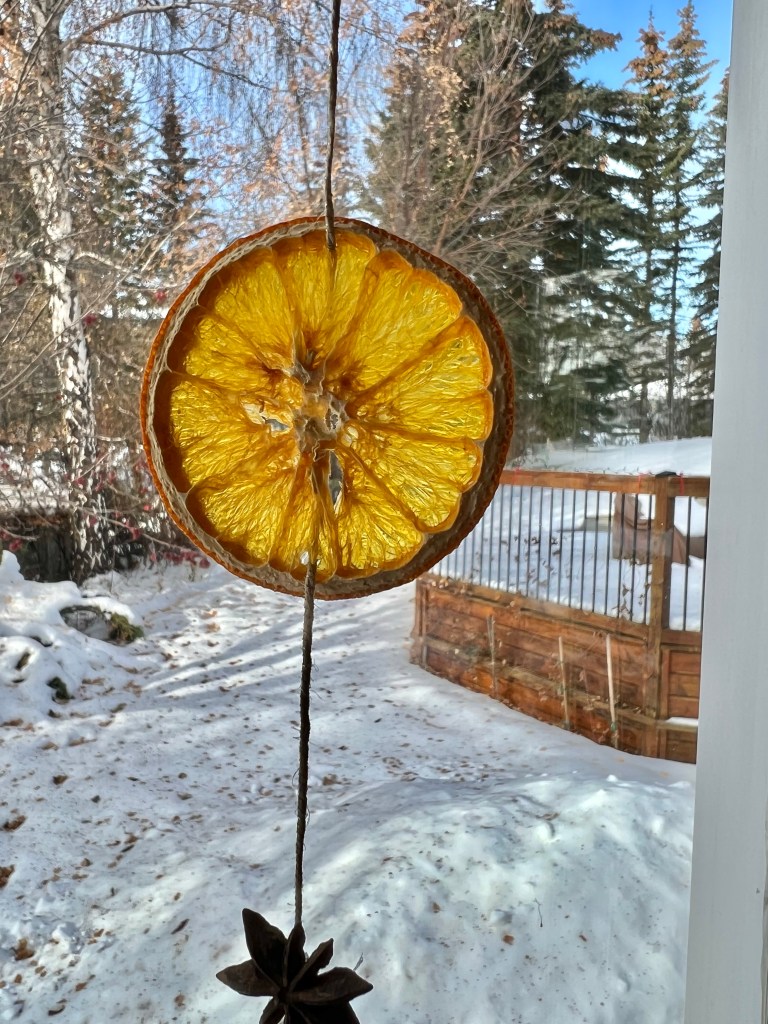
The dried oranges will last from year to year once dried, but making them is such fun that I made some more this year to suspend from jute with star anise and cinnamon sticks for accent shapes. When the sun shines through them, they light up like stained glass. I love them!
Last year, I used the dried oranges as individuals, hanging them on the tree as ornaments, and in potpourri arrangements.
They look so “at home” in the sunroom, I might not take them down after Christmas.
To dry the oranges
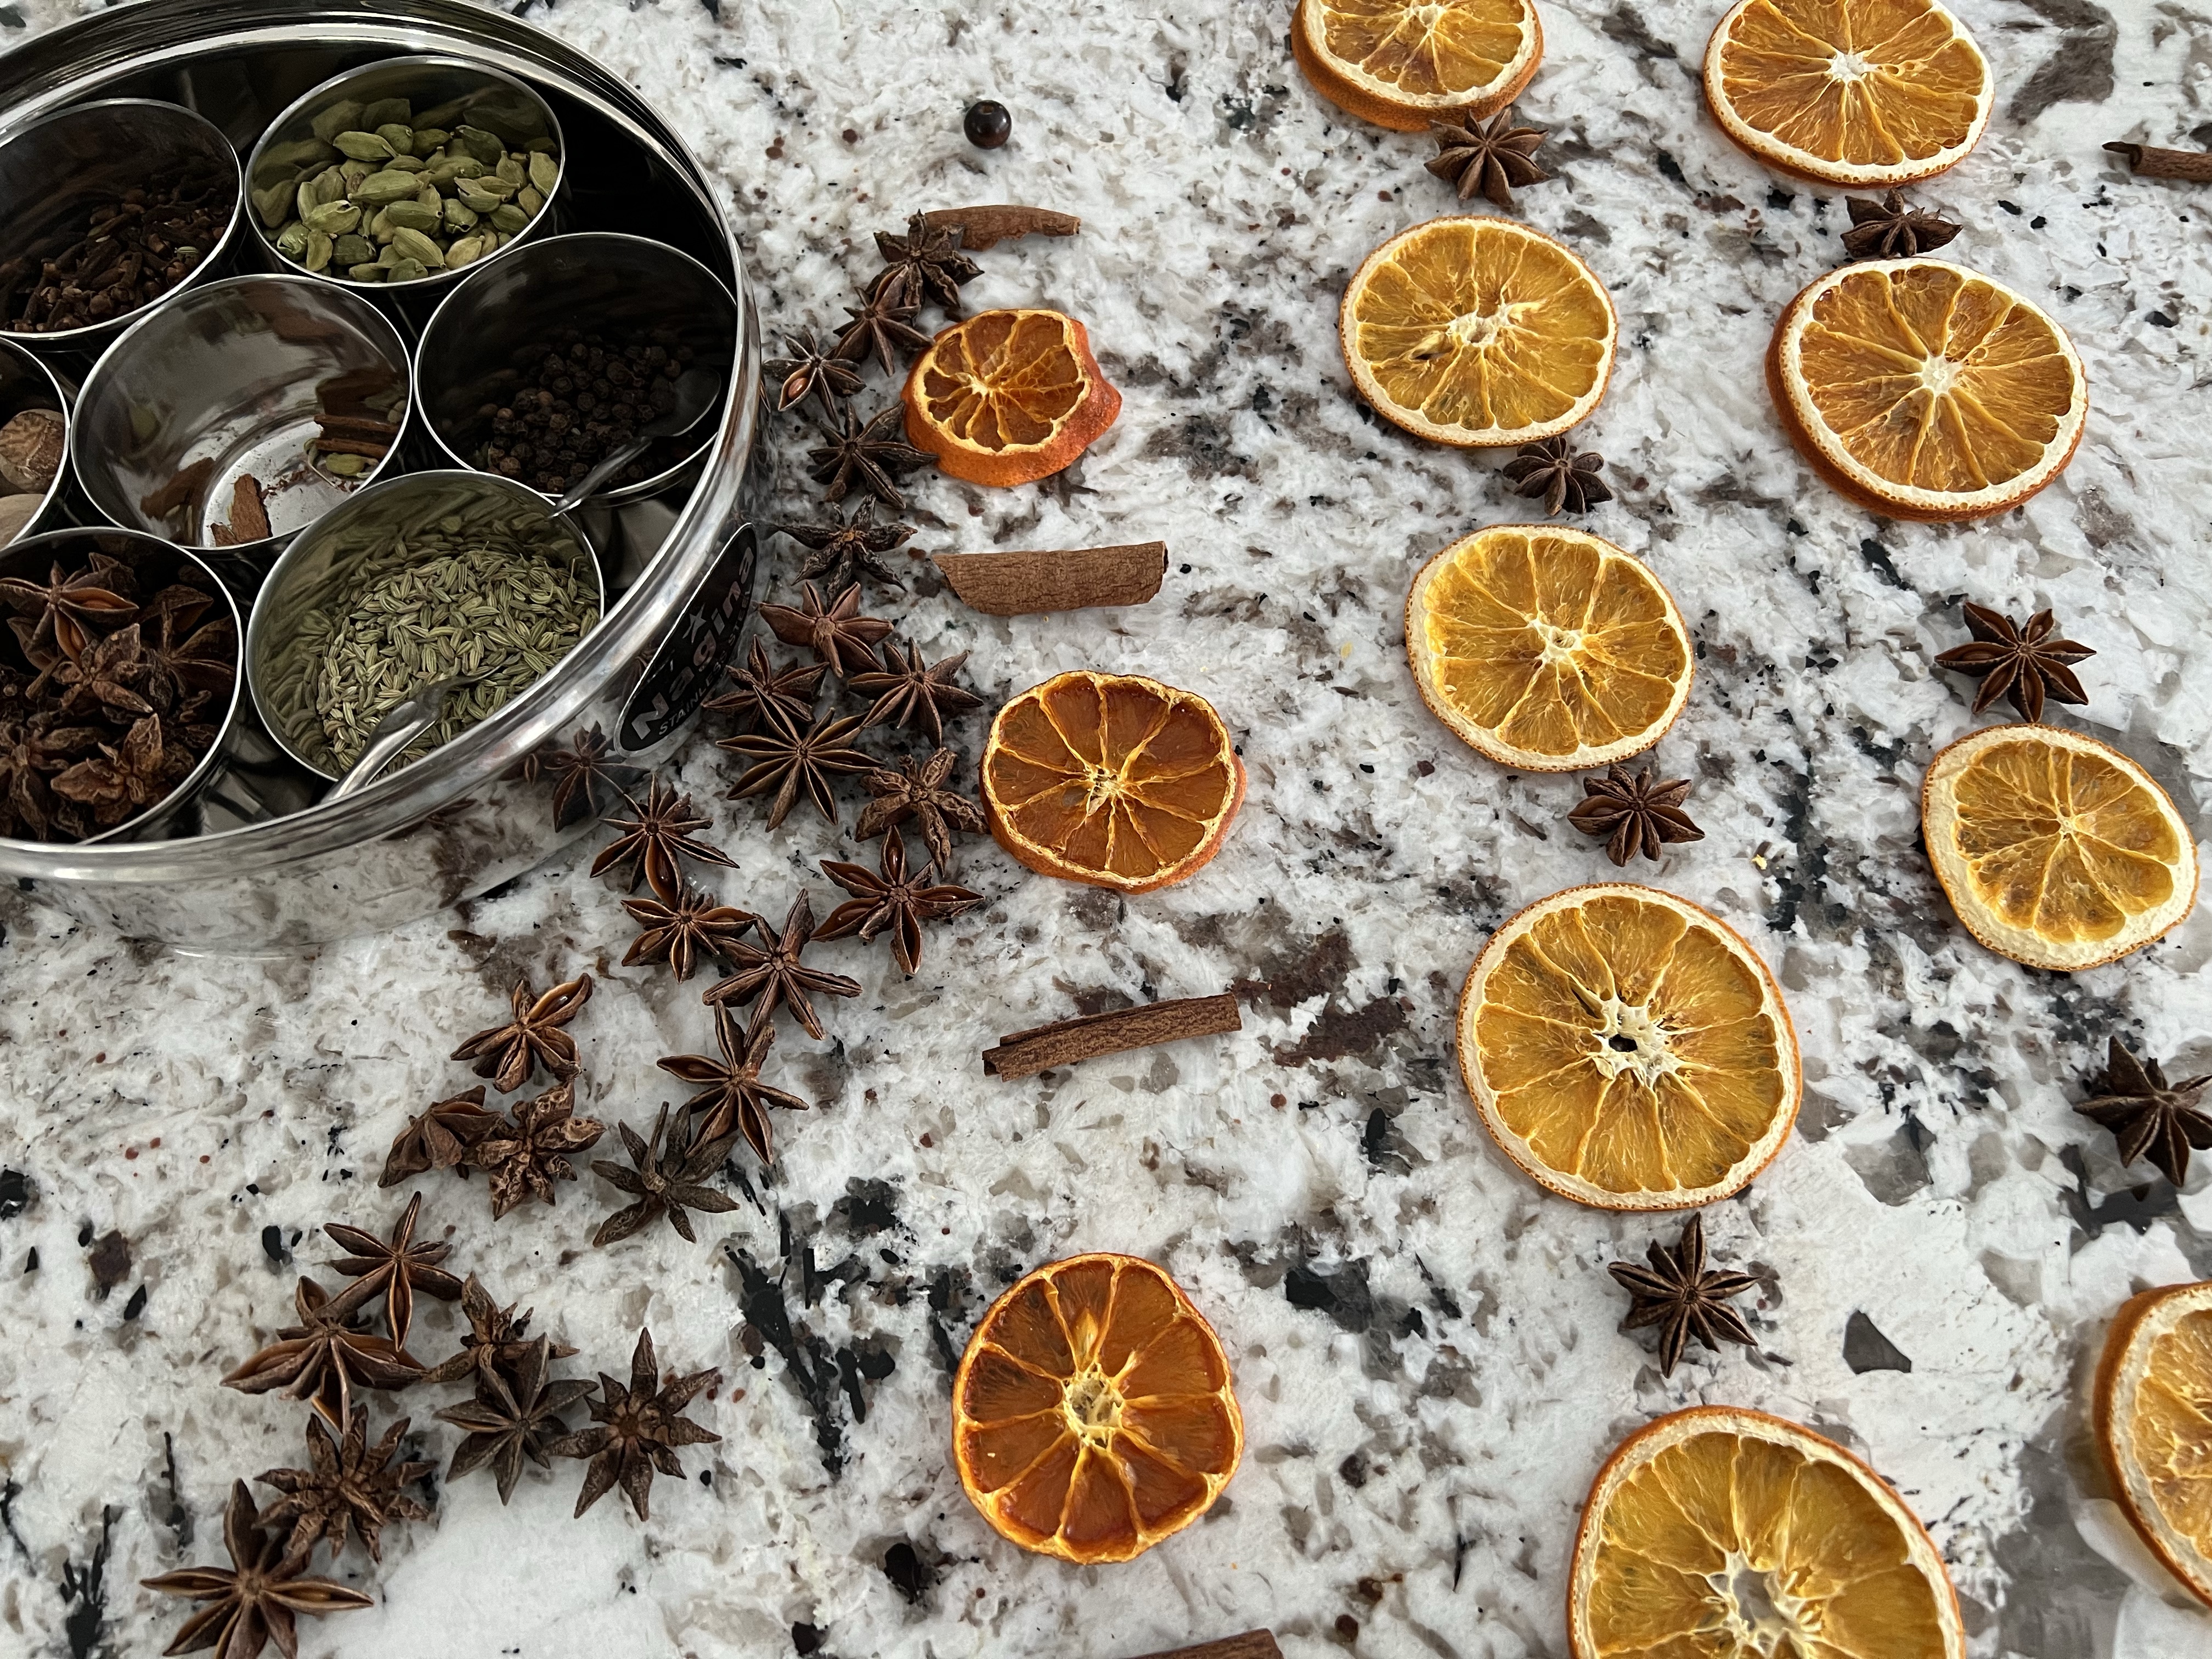
You can choose whichever type of oranges you like – this year I added clementine oranges to my favourite naval oranges. I love the amber colour the naval oranges produce. You can also use other citrus fruits for different sizes and colours.
Preheat your oven to 175 degrees Fahrenheit. I also use my convection setting to speed things up, but it is not necessary. If you have a food dehydrator, this would also be ideal. The goal is to remove the moisture from the oranges to preserve them. The sugars leave a shiny gloss to the remaining structure of the orange.
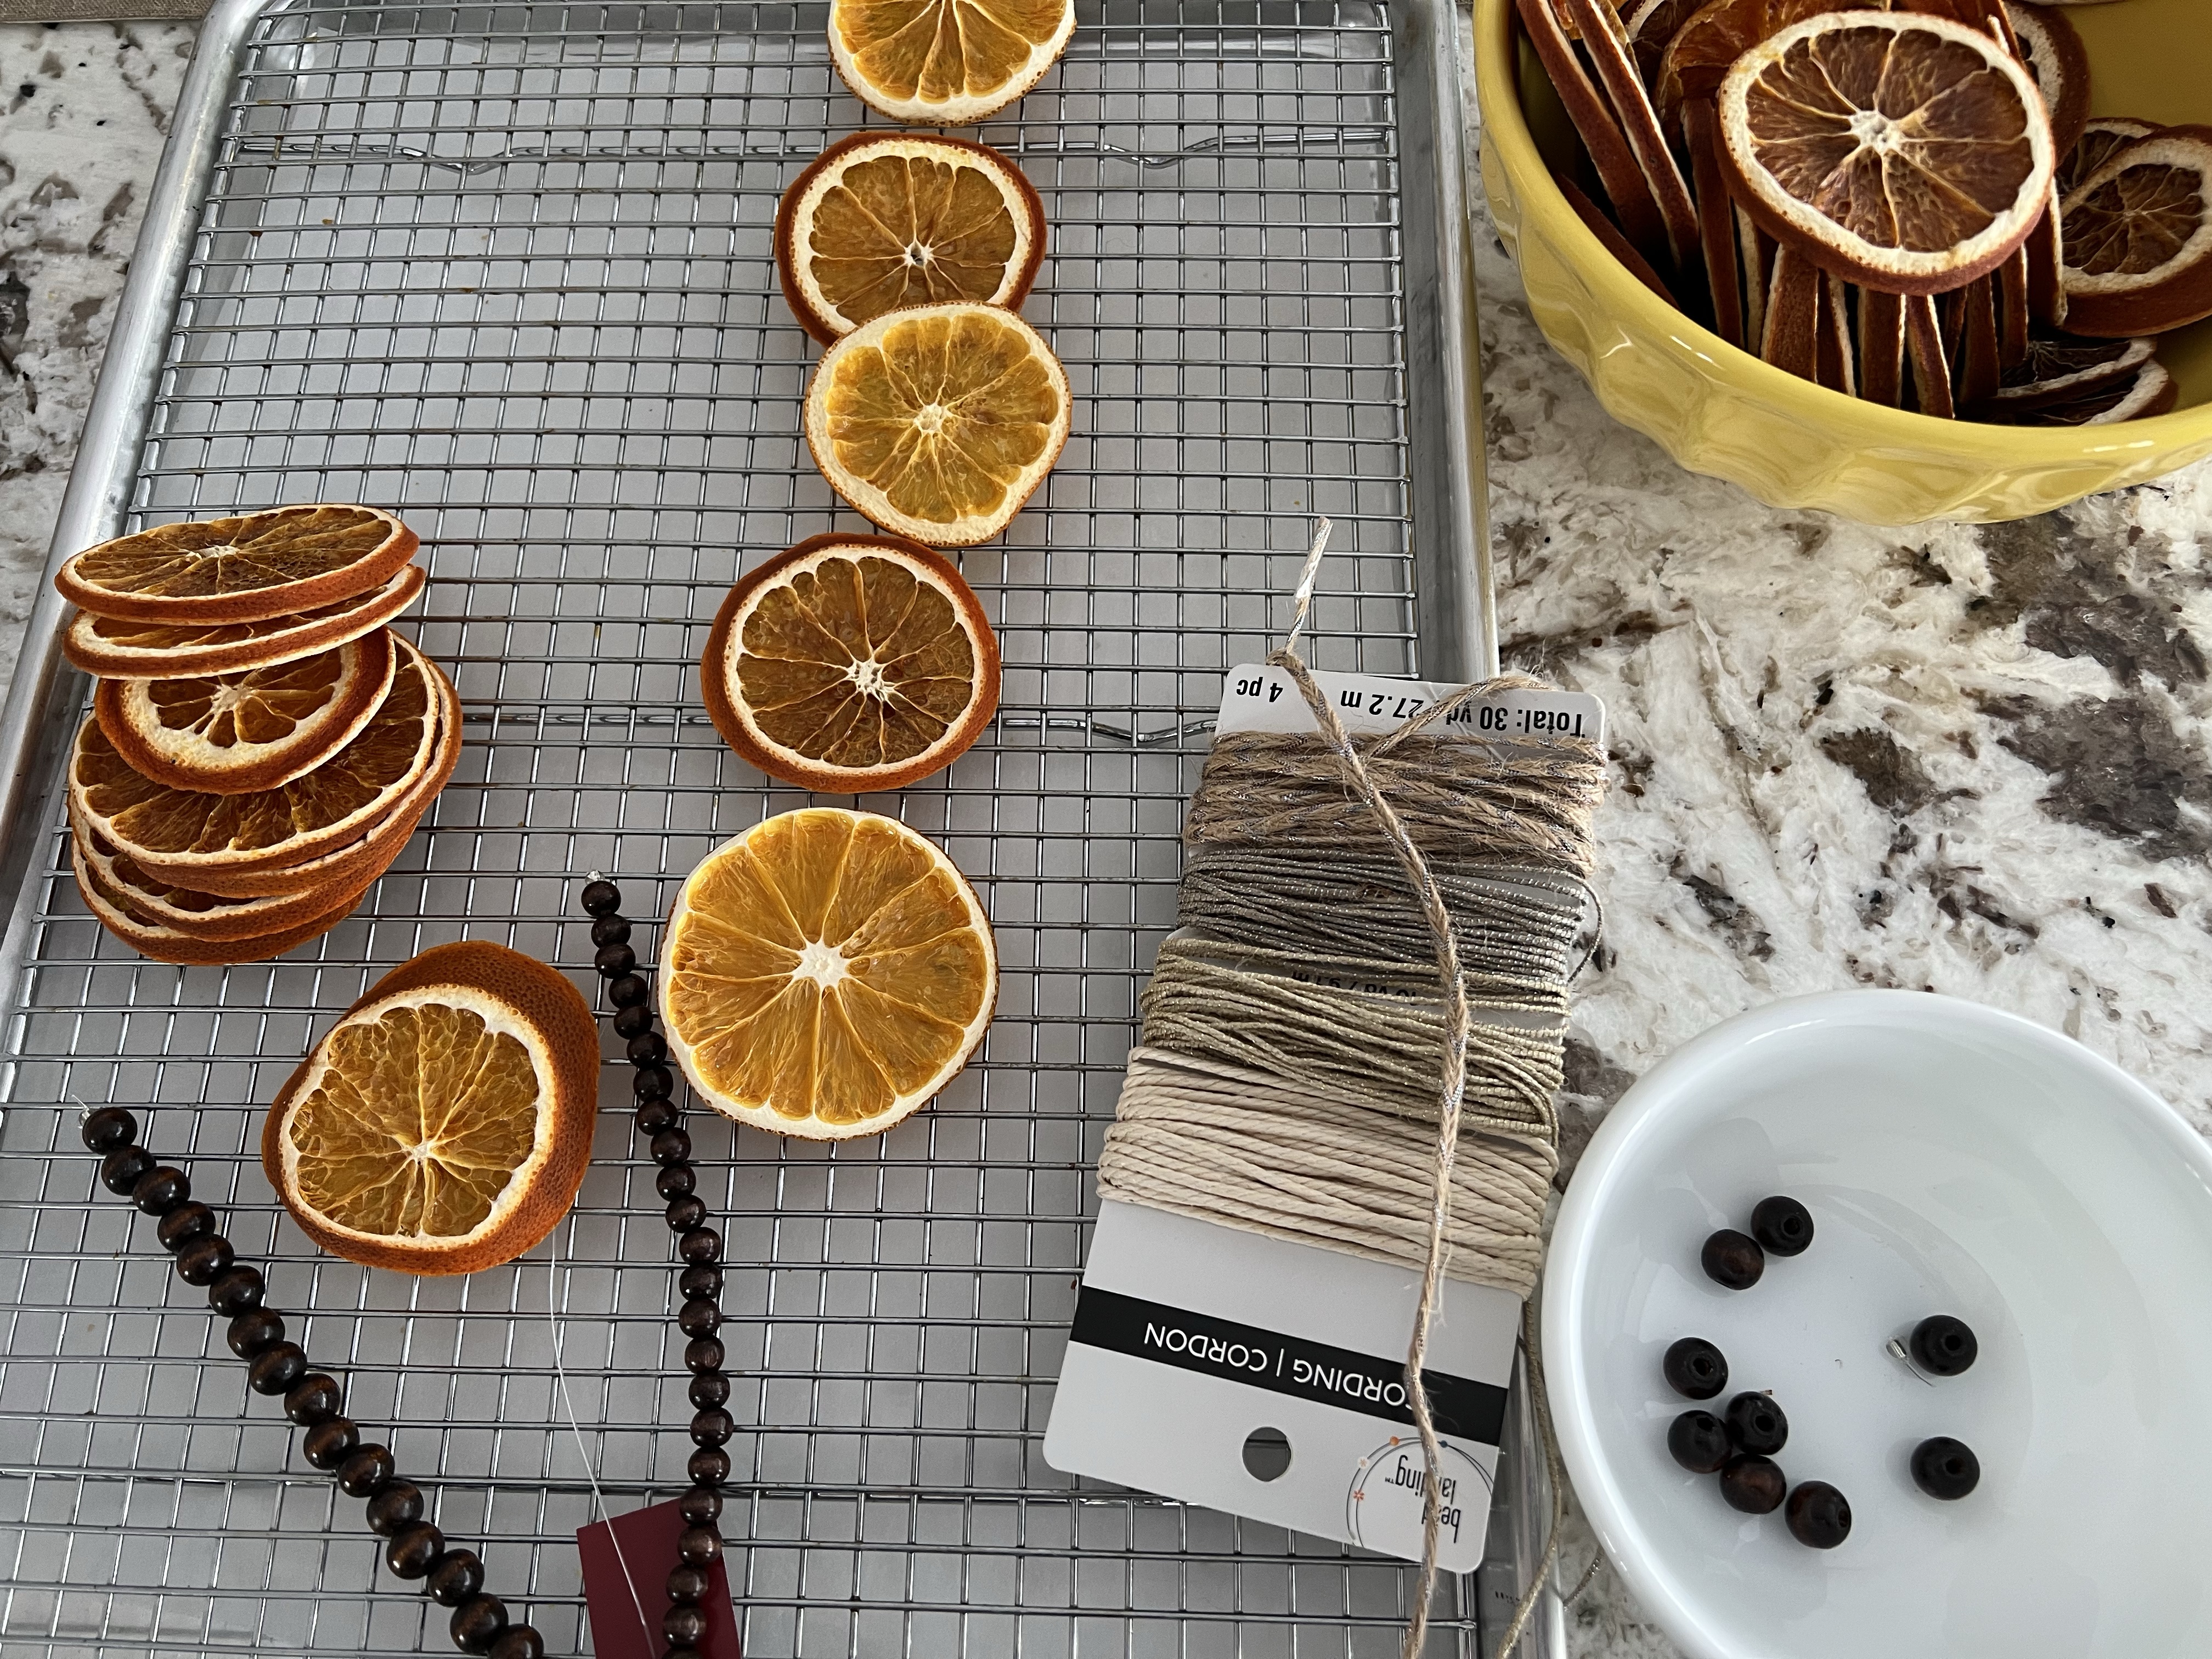
I like to cover a sheet pan in parchment and then place a cooling rack on top of the paper. Cut the oranges into 5-7 mm slices and pat with paper towel to remove as much juice as you can before laying the orange slices on the rack, leaving room around each one for good air circulation.
Put the oranges in the oven, and flip them after two hours to prevent curling. Repeat this for 2-6 more hours depending on the juiciness of the oranges. They will get to a point where they are quite hard and no longer sticky. Remove from oven at this point and let them finish drying on the rack another day or so.

Going into the oven

Almost done, but still have some moisture to lose.

Finished. Still shiny, but no longer sticky or wet.
To make the ornaments
suggested additional items: jute, ribbon, spices, pine cones, beads, spruce tips, a needle with a large eye, glue gun, scissors
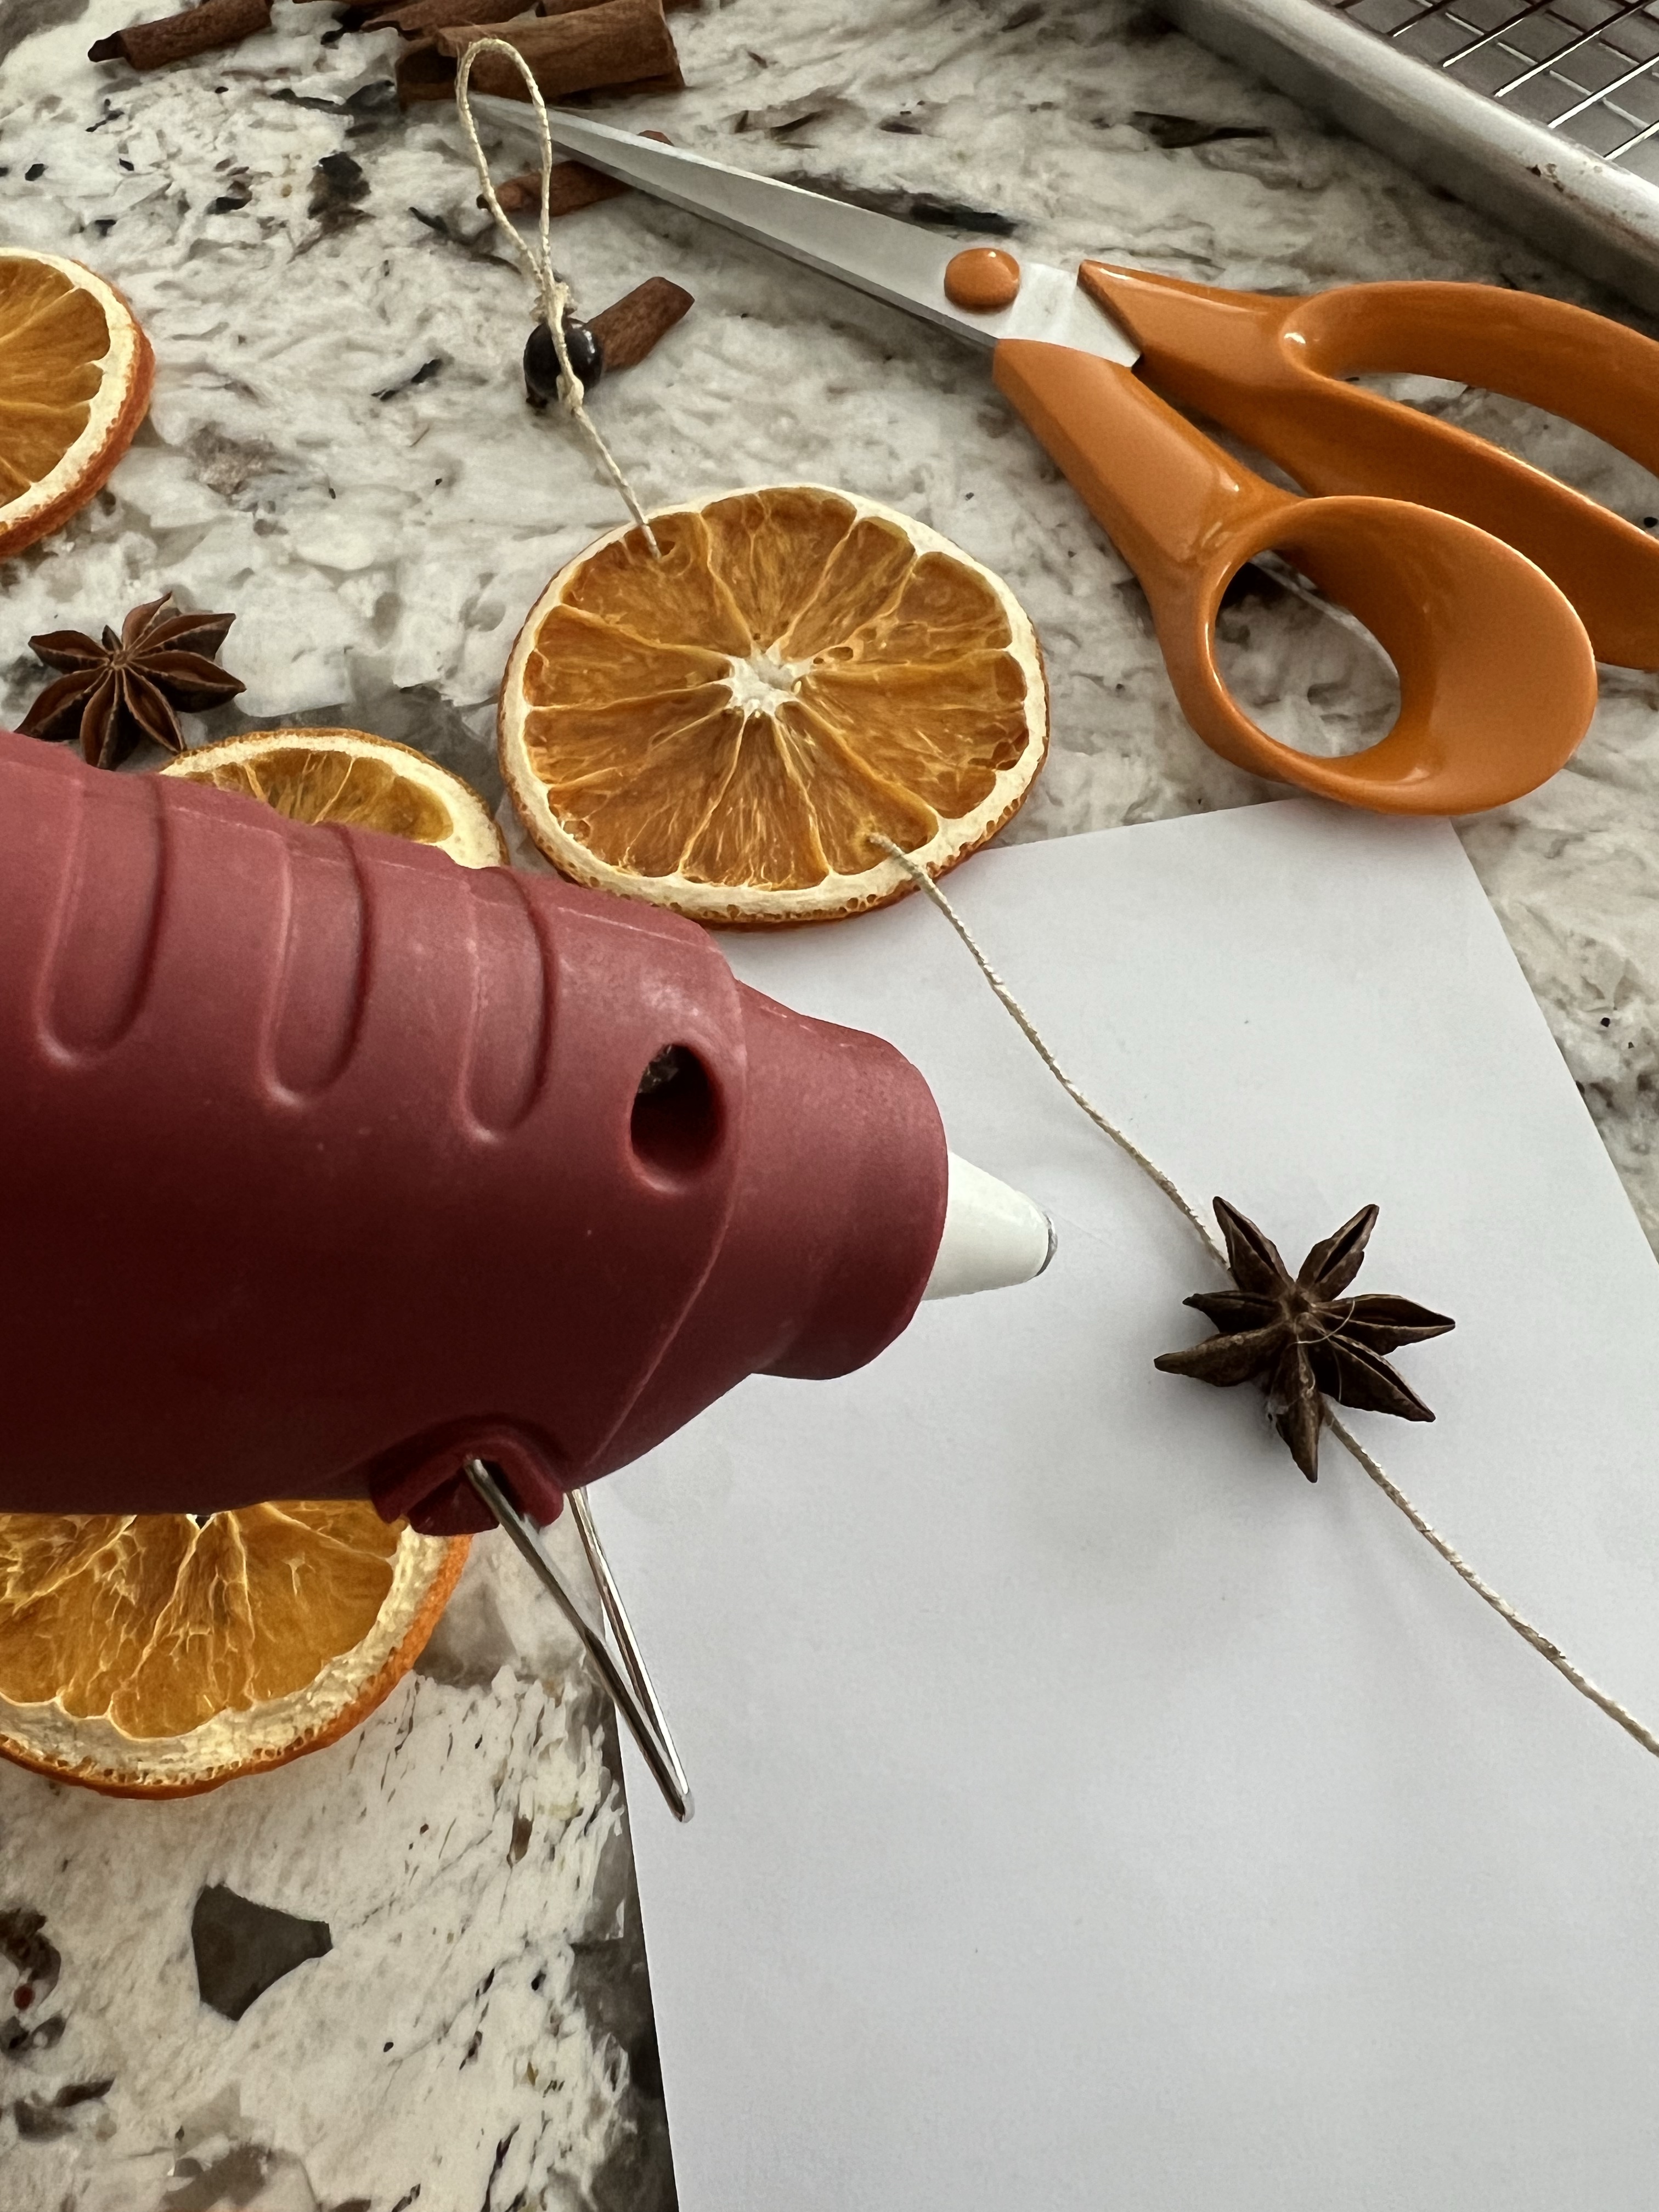
Arrange your dried oranges and any other bits you want on the hanging to form your pattern. Consider where you would like to hang them and how long they should be. You will also need a needle with a large eye to accommodate your jute or string. Alternately, you could just poke a hole in the orange and thread the string though directly.
I used a wooden bead to form the top of my hanging strings. Feed both ends of the jute through the hole to form a loop at the top and tie a knot above and below to hold it.

Thread the needle and pierce the orange near the rind at the top, and then out at another hole in the bottom. I found they hold themselves wherever I put them along the jute, so didn’t knot them in place. Although there is a convenient hole in the center of the oranges that works well for garlands and swags, I wanted my orange slice to hang upright, so made my own holes.

Further down the jute, I used the hot glue gun to attach star anise or cinnamon sticks to the hanging, alternating with orange slices. I finished the length with another bead, knotted in.
Hang somewhere the light will shine through them. Orange joy!


Those look so pretty!! Mmm the kitchen must have smelled amazing as you dried them. So nice 🥰
Sent from my iPhone
LikeLiked by 1 person
Thanks for sharing this tutorial. I’ve been wanting to create dried orange slices for a while and I’m looking forward to giving it a go now.
LikeLiked by 1 person
We have been enjoying them so much!
LikeLiked by 1 person